Ingredients
Instructions
Combine the cornmeal, flour, sugar, baking powder, salt, and cayenne pepper in a large mixing bowl.
In a separate bowl, whisk together the egg, and buttermilk. Add to the dry ingredients along with the grated onion and its juices, stirring until combined.
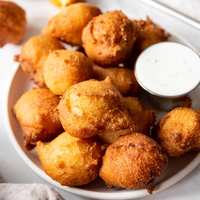
Heat 2 inches of oil over medium-high heat in a large cast iron skillet or dutch oven until it reaches 375°F on a digital thermometer. When hot, carefully use two spoons to drop tablespoonfuls of batter into the hot oil, using the back of one spoon to push the batter in one at a time. Work in batches so as not to overcrowd the pan. Fry for 2-3 minutes, turning partway through with a wire spatula, until the hush puppies are golden brown.
Remove the hush puppies from the oil and transfer to a wire rack set over a baking sheet lined with paper towels. Keep an eye on the oil temperature while frying so that it stays consistent, adjusting the heat up or down as necessary.
Notes
How to store: Leftover hush puppies can be stored in an airtight container at room temperature for 3-4 days or in the fridge for up to 1 week.
How to freeze: Arrange cooked hush puppies in a single layer on a baking sheet and freeze for 1-2 hours, then transfer to a resealable airtight container for longer term storage up to 3 months.
Reheating: First, thaw if frozen. Then reheat in the air fryer or oven for best results. You can also use the microwave to reheat a few at a time. If you have an air fryer, hush puppies reheat really well by popping them in for 3-4 minutes to crisp up the outsides and taste almost as good as when they are fresh. Control the oil temperature. Use a good digital thermometer to maintain the oil temp right around 365°F, although anywhere between 350°F and 375°F will work. At lower temperatures, fried food absorbs more oil and takes longer to cook, while higher temperatures result in the outside burning before the inside is done.
Notes: This is similar to the one I used but not identical. I may replace this later.